
If you want a simple way to store flagged emails as files for future reference, you’ll love this guide. With Power Automate Email Export in 5 Steps, you can automatically export flagged emails, avoid duplicate files, and safely save them in your storage.
🌟 What You’ll Achieve
By following Power Automate Email Export in 5 Steps, you’ll be able to:
- Export flagged emails directly as .eml files
- Prevent duplicate file creation with a metadata check
- Build a reliable and automated backup system
- Save emails into SharePoint, OneDrive, or your preferred storage
🧰 Prerequisites
To implement Power Automate Email Export in 5 Steps, you need:
- Access to Microsoft 365 with Power Automate
- An email account (Outlook/Exchange Online)
- A SharePoint or OneDrive document library to store the exported emails
🧱 Step-by-Step: Create the Flow
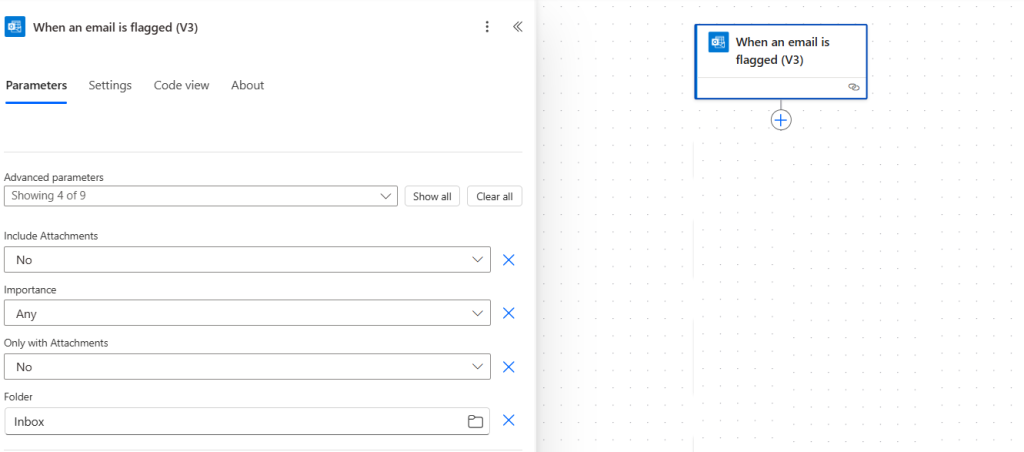
🔹 Step 1: Trigger on Flagged Emails
- Go to make.powerautomate.com.
- Create a new flow with trigger: When an email is flagged (V3).
- This ensures your flow only runs when you flag an email.
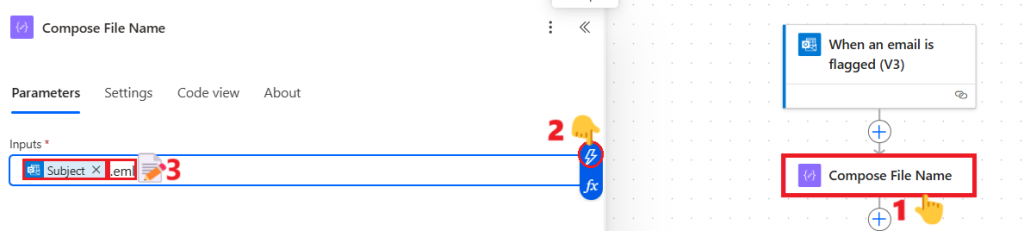
🔹 Step 2: Compose the File Name
- Add action: Compose.
- In the Inputs field, click the flash icon and select Subject from the dynamic content list.
- Then type
.emlafter it. This will save the email subject as the file name with an.emlextension.
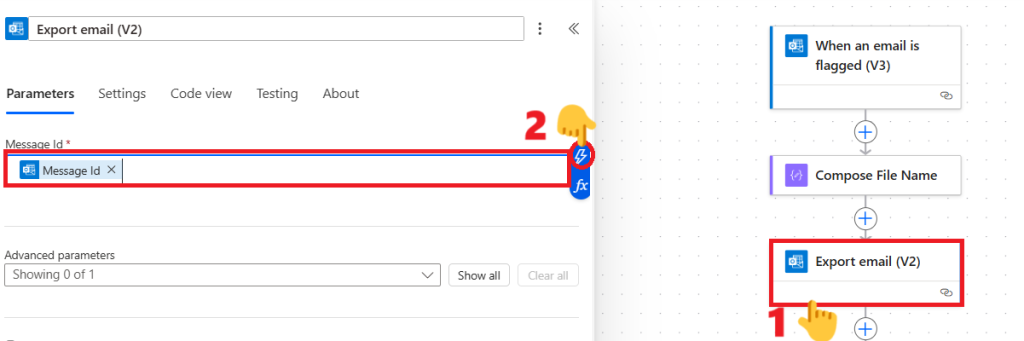
🔹 Step 3: Export the Email
- Add action: Export email (V2).
- In the Message Id field, select Message Id from the dynamic content list by clicking on the flash icon.
- This generates the raw .eml content of your flagged email.
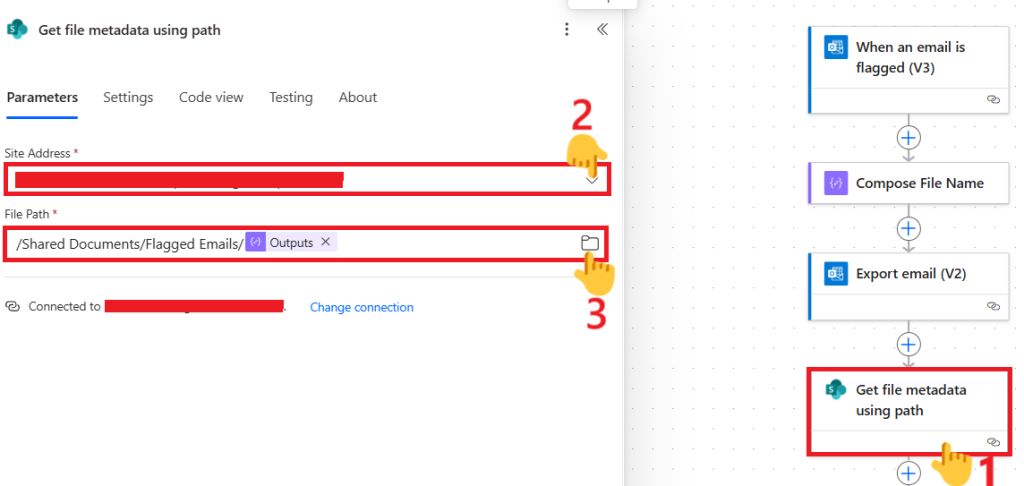
🔹 Step 4: Check for Existing File
- Add action: Get file metadata using path.
- In the Site Address field, select the SharePoint site where you want to save the email file.
- In the File Path field, click the folder icon and select any file. This will insert both the file path and file name into the field. Once the path appears, remove the file name and replace it with the “Outputs” dynamic content from the Compose action.
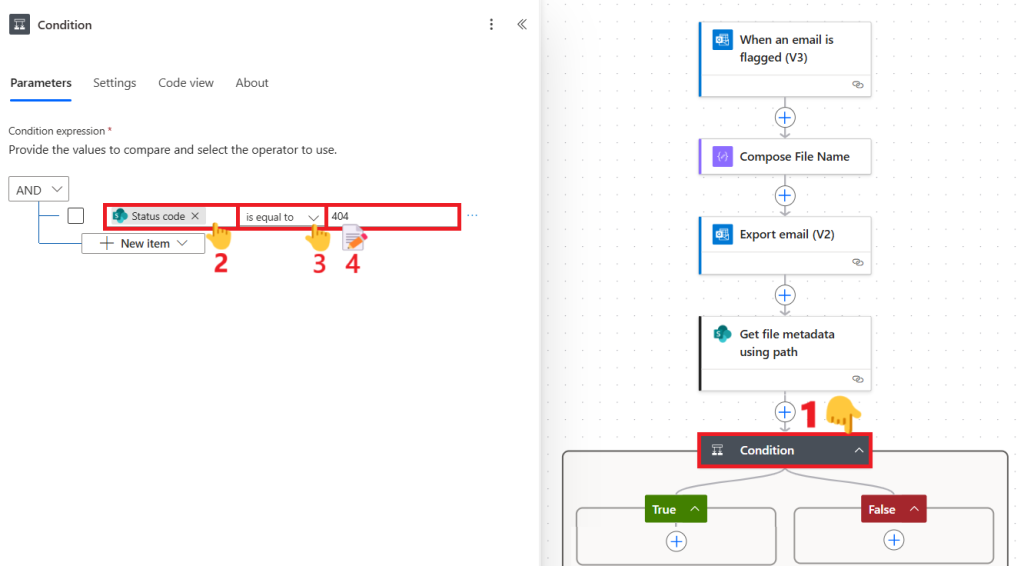
- Now, add a Condition
- In the first field, copy the below expression:
@{outputs('Get_file_metadata_using_path')?['statusCode']} - In the dropdown, select:
is equal to - In the second field, type:
404- The status code
404indicates that the file does not exist. This prevents duplicate exports.
- The status code
- In the first field, copy the below expression:
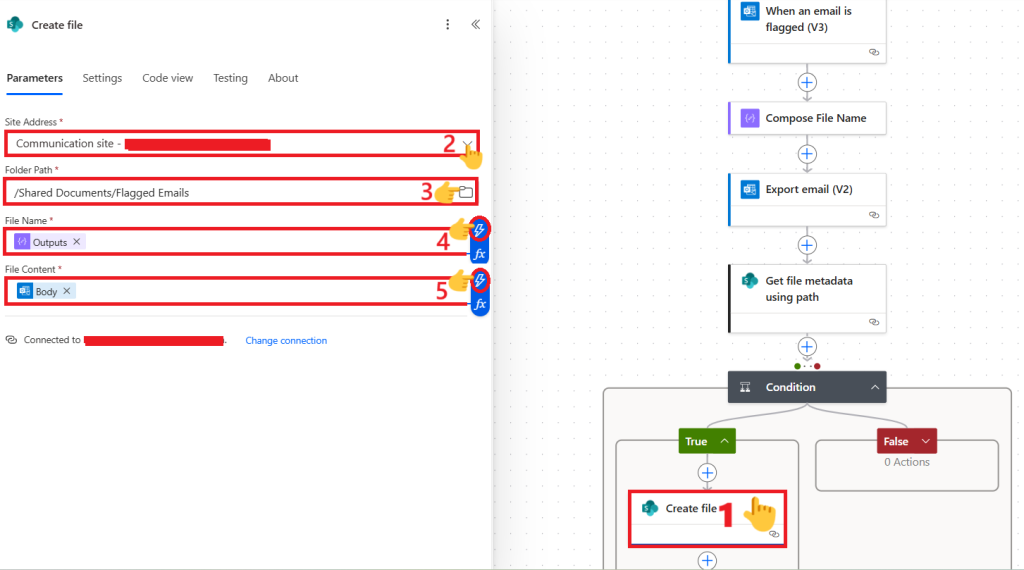
🔹 Step 5: Create the File
- Inside the True branch of the condition:
- Add action: Create file.
- In Site Address: Select the SharePoint site.
- In Folder Path: Choose your document library and folder path by clicking on the folder icon.
- In File Name: Select the Outputs of the Compose action by clicking on the flash icon.
- In File Content: Select the Body from the Export email (V2) action by clicking on the flash icon.
- Add action: Create file.
Now your flow automatically saves each flagged email as an .eml file only once.
🎯 Result
After completing Power Automate Email Export in 5 Steps, every flagged email gets exported as an .eml file into your chosen storage-without duplicates.
📈 Bonus Tips
- 📝 Use dynamic folder paths to organize emails by sender or date.
- ⚡ Add parallel branches to also log details into an Excel file for tracking.
- 🔒 Combine this with retention policies to build a compliance-friendly archive.
🏁 Wrapping Up
With Power Automate Email Export in 5 Steps, you now have a secure, automated way to back up flagged emails. This method ensures that your important emails are always saved, duplicates are avoided, and everything is just a click away.