
This tutorial shows the easiest way to create personalized Word documents and automatically send them without paying for premium connectors. Using Power Automate, SharePoint, and Excel, you can streamline your onboarding emails completely free with standard licenses, while learning how to populate Word documents efficiently.”
This guide walks you step-by-step through building the flow.
🚀 What You’ll Achieve
With this Populate Word Document tutorial, you’ll be able to:
- Create a Word template with dynamic placeholders
- Pull employee data from an Excel file stored in SharePoint
- Automatically generate Word files for each new employee
- Send personalized welcome emails with attached Word documents
- Update Excel to mark “Sent”
🧰 Prerequisites
- Microsoft 365 account with Power Automate
- SharePoint document library
- Excel file with employee data
- Word template with Quick Parts placeholders
🧱 Step-by-Step: Create Word & Excel Files and Build the Flow
🔹 Step 1: Prepare SharePoint Library
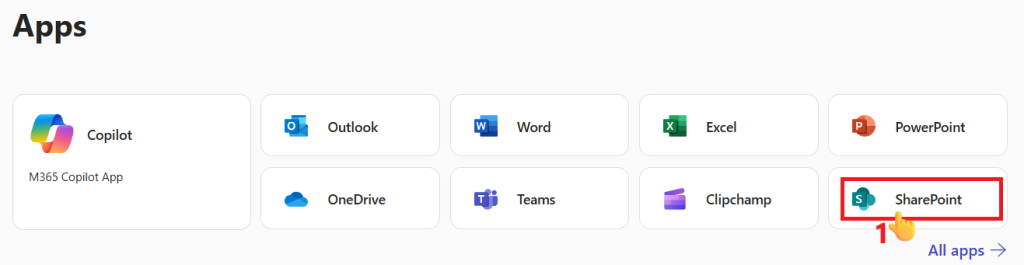
- Go to Microsoft 365 Apps.
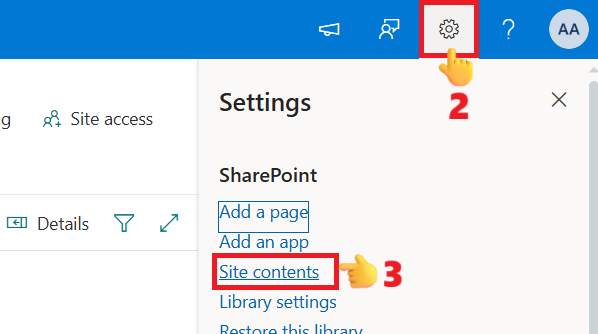
- Open SharePoint > gear icon (top-right) > Site contents.
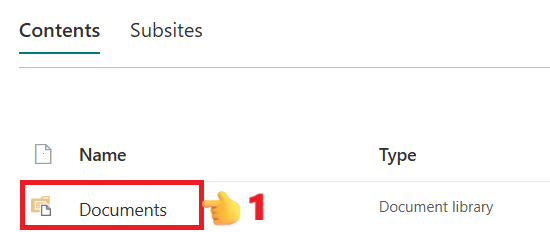
- Open your Documents library or create a new one.
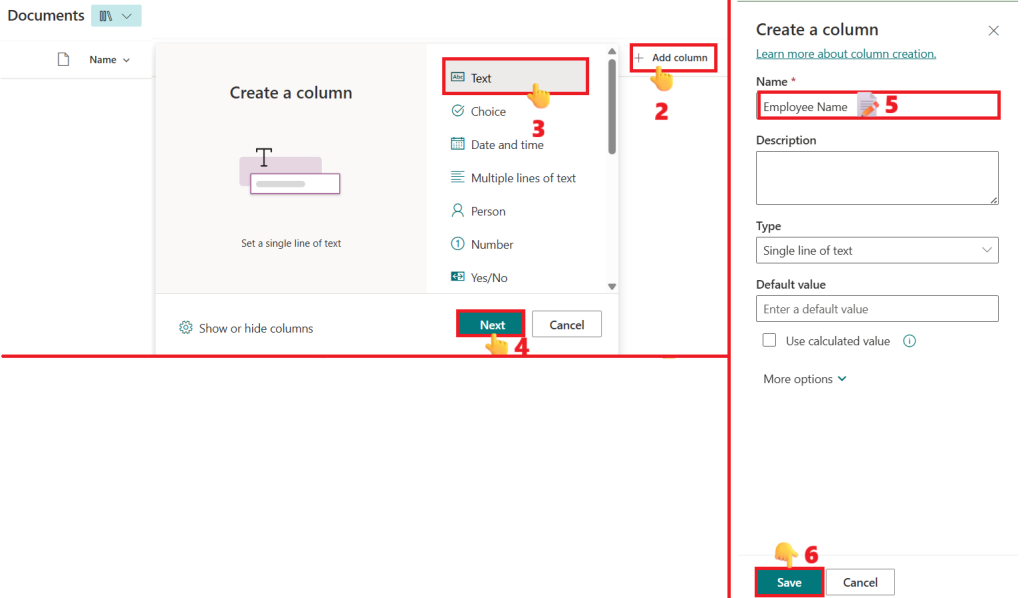
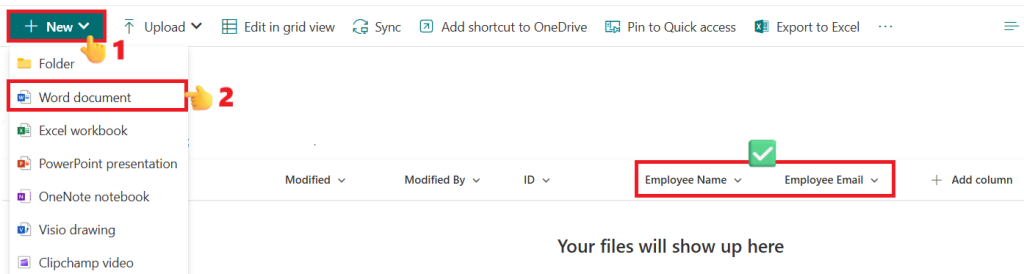
- Add two custom columns-you can add more depending on your template’s dynamic data:
- Employee Name
- Employee Email
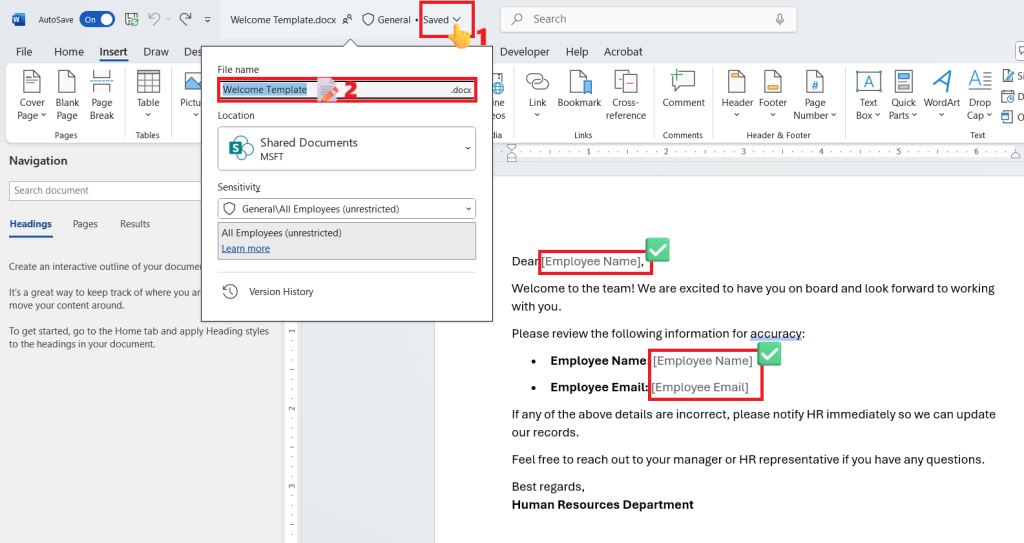
🔹 Step 2: Create a Word Template
- Click New > Word Document in your library.
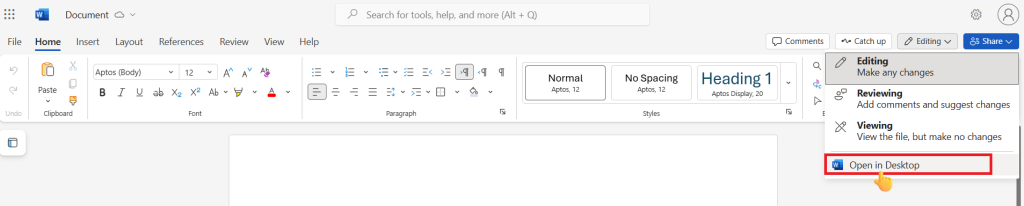
- In the new document, click Editing (top-left) > Open in Desktop.
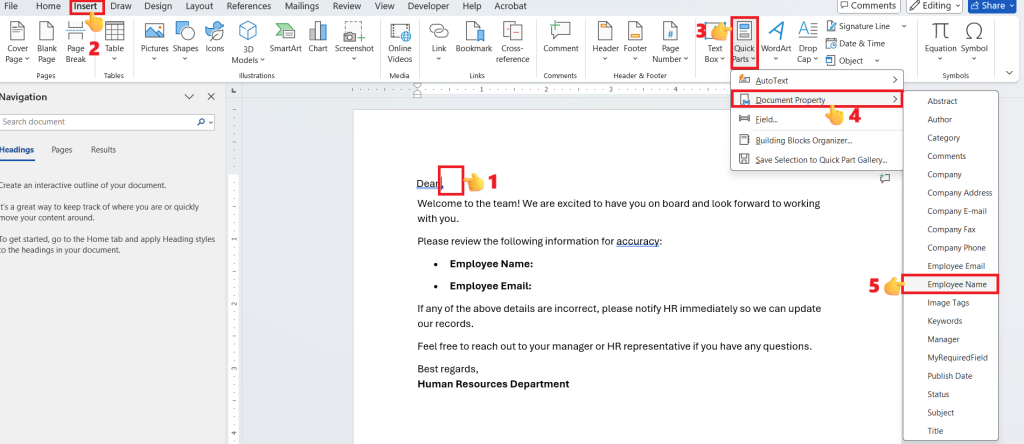
- Add your welcome message, then place your cursor where you want to insert the custom column values..
- Insert placeholders: Insert > Quick Parts > Document Property > select custom columns.
- After adding both columns, rename the file ‘Welcome Template’ and then close it.
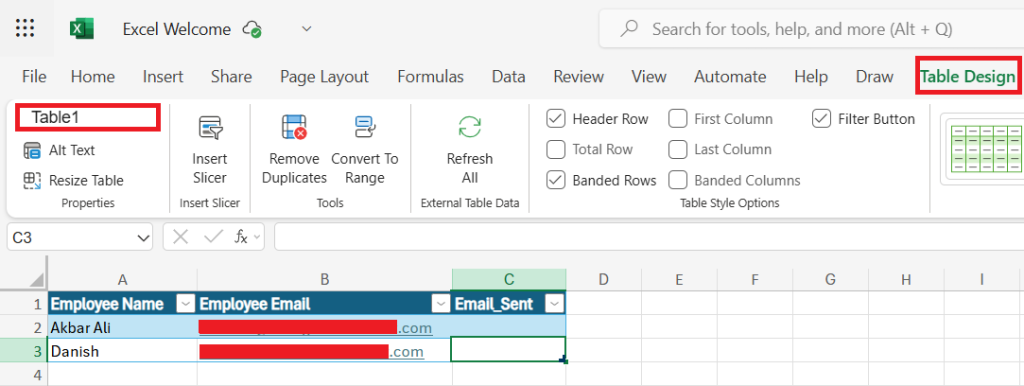
🔹 Step 3: Create an Excel File
- Return to your SharePoint library and click New > Excel Workbook in the same location.
- Add a table with columns:
- Employee Name
- Employee Email
- Email_Sent (avoid spaces in the column name-use an underscore or write it as a single word)
🔹 Step 4: Create the Scheduled Flow
- Go to Power Automate > Create > Scheduled Cloud Flow.
- Flow Name: Welcome Emails
- Click on “Create” button
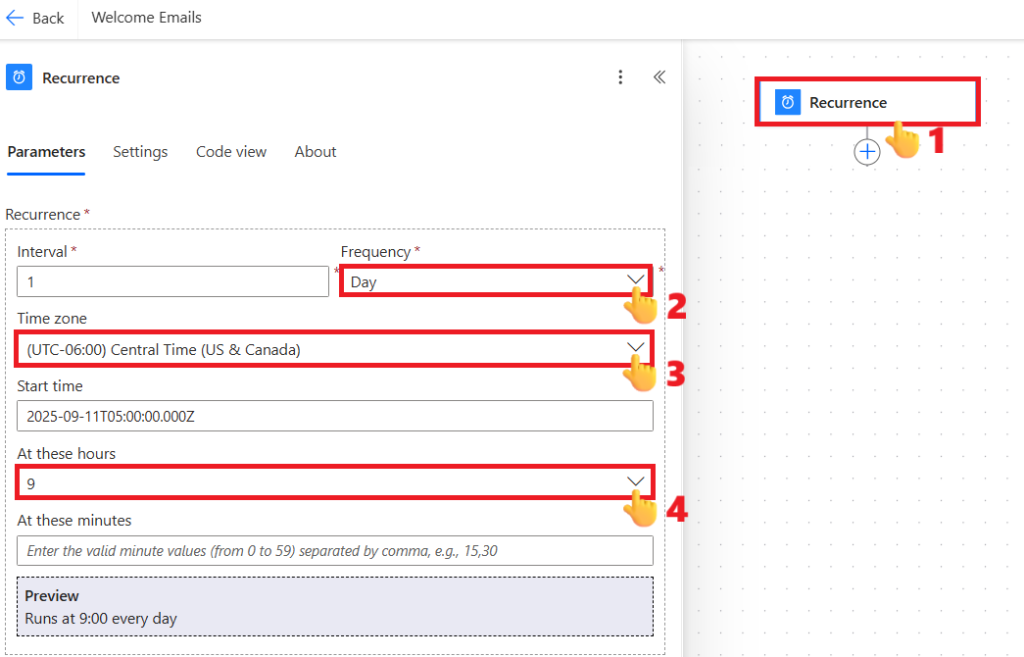
Configure the trigger
- Frequency: Select Day.
- Time zone: Choose your own time zone; otherwise, the flow will run according to UTC.
- At these hours: Enter the hour you want the flow to run.
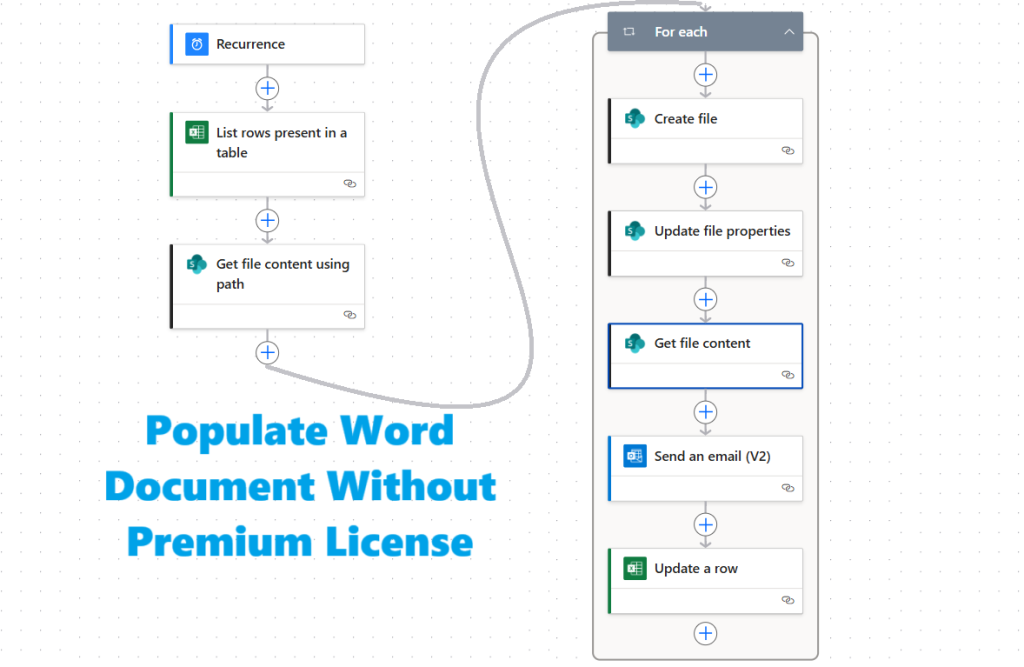
Add the following actions:
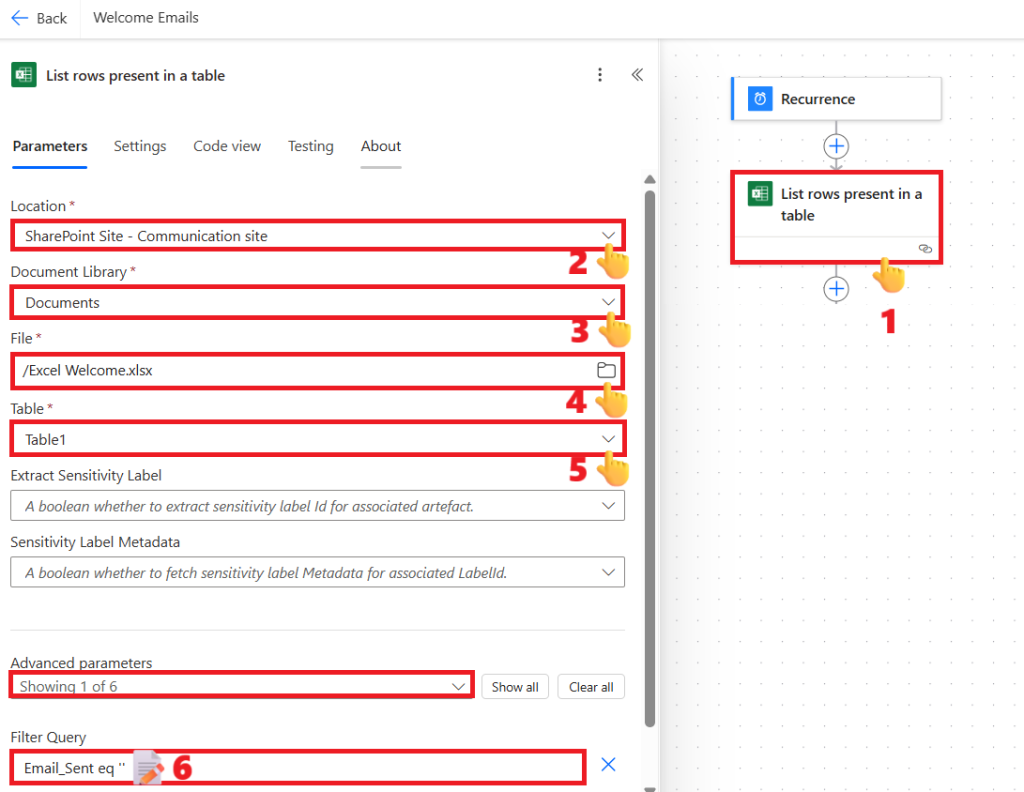
Action 1: List rows present in a table
Use this action to retrieve employee names and email addresses from the table in your Excel file.
- Location: Select the SharePoint site where you’ve saved the Excel file.
- Document Library: Choose the document library where the Excel file is stored.
- File: Click the folder icon and select the Excel file.
- Table: From the dropdown, select the name of the table inside your Excel file.
- Filter Query: Enter the following filter query to ensure only rows where the email has not yet been sent are picked up:
Email_Sent eq ''
(This uses the Email_Sent column to check whether the email has already been sent. After the flow sends an email, it will update this column’s value to “Sent.”)
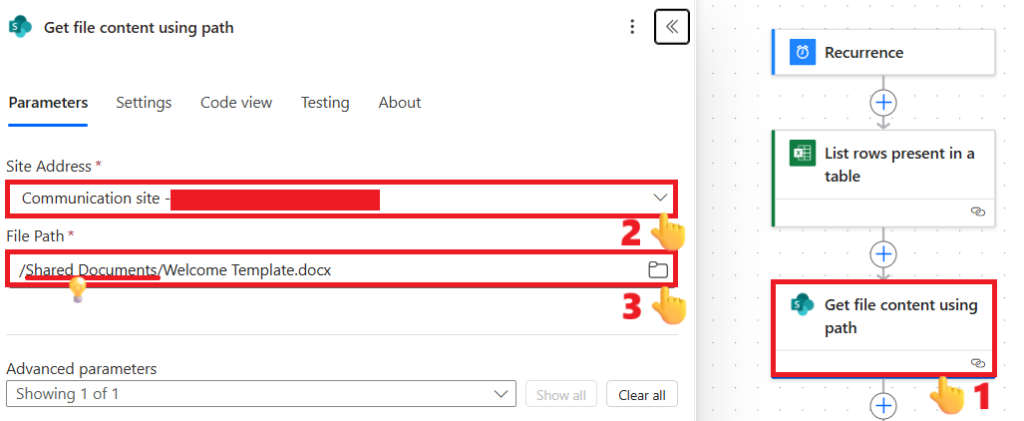
Action 2: Get file content using path
This action retrieves the content of the Word template file.
You’ll use this content in the next action to create a new Word file for each record.
- Site Address: Select the SharePoint site where your Word template file is saved.
- File Path: Click the folder icon and select the Word template file.
Note: If your template file is in the Documents library, it may appear as Shared Documents here. This is because Shared Documents is the internal name of the library.
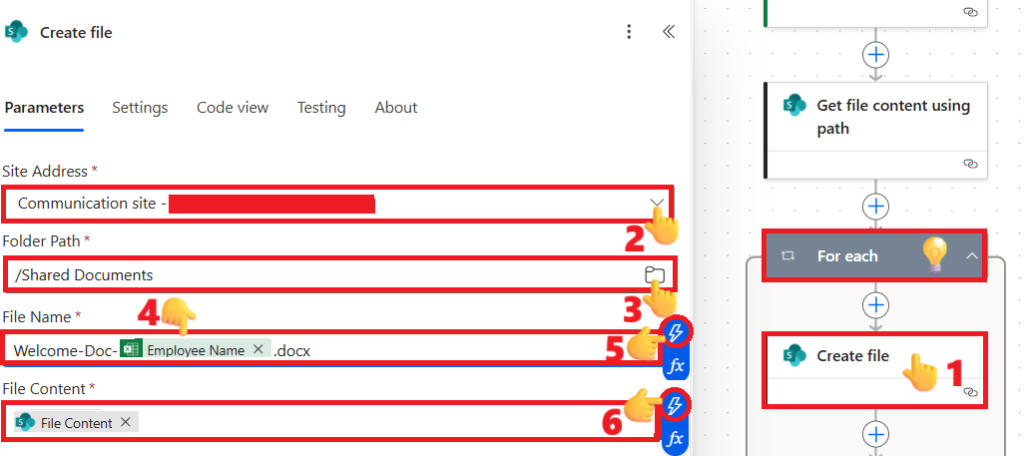
Action 3: Create file
Use this action to generate a new Word file by using the output content from the previous action.
- Site Address: Select the SharePoint site where you want to save the new file.
- Folder Path: Choose the document library in the selected SharePoint site where the new Word file should be saved.
- File Name: Enter
Welcome-Doc-.docx. Place your cursor before.docxand insert Employee Name from the dynamic content list by clicking the flash icon. Select Employee Name under the action List rows present in a table. If it’s not listed, typeEmployee Namein the search field to find it.
💡Once the dynamic content Employee Name is selected, Power Automate will automatically wrap the action inside a For each loop. - File Content: Click the flash icon and select File Content from the dynamic content list under the action Get file content using path.
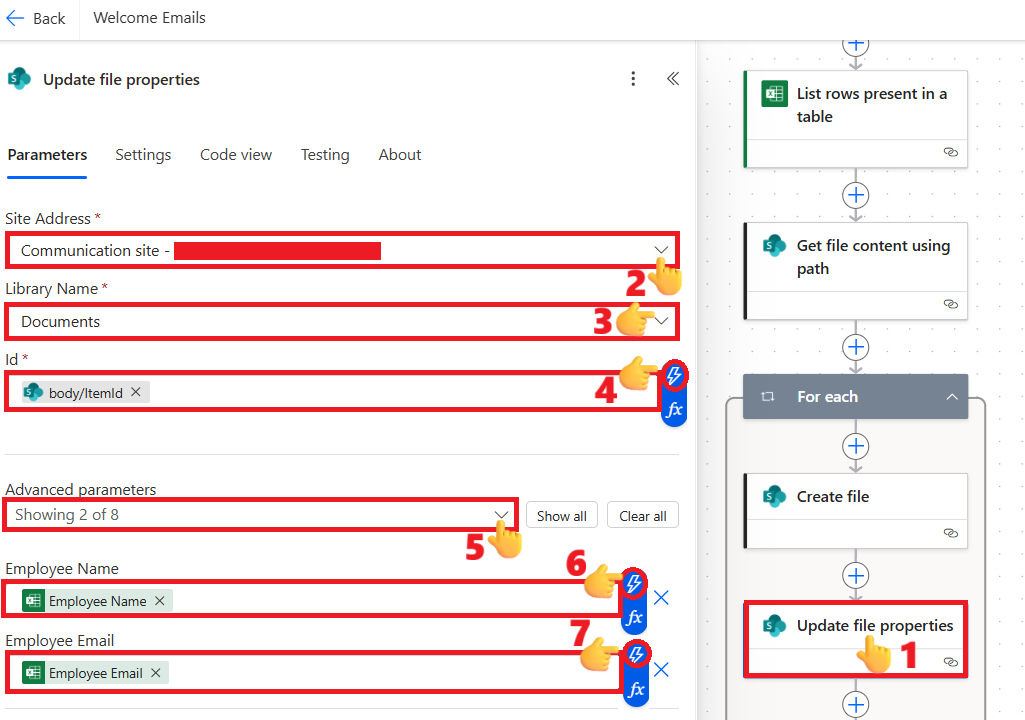
Action 4: Update file properties
Use this action to add Employee Name and Employee Email from the Excel file into the corresponding SharePoint library columns for the new document, ensuring these values are correctly reflected inside the Word document.
- Site Address: Select the SharePoint site where you saved the new file in the previous Create file action.
- Library Name: Choose the document library in that SharePoint site where the new file was saved.
- Id: From the dynamic content list, click the flash icon and select body/ItemId under the Create file action.
- Advanced Parameters: Expand this section and check both Employee Name and Employee Email to populate these values for the new document.
- Employee Name: Insert Employee Name from the dynamic content list by clicking the flash icon. Select Employee Name under the action List rows present in a table. If it’s not listed, type
Employee Namein the search field to find it. - Employee Email: Insert Employee Email from the dynamic content list by clicking the flash icon. Select Employee Email under the action List rows present in a table. If it’s not listed, type
Employee Emailin the search field to find it.
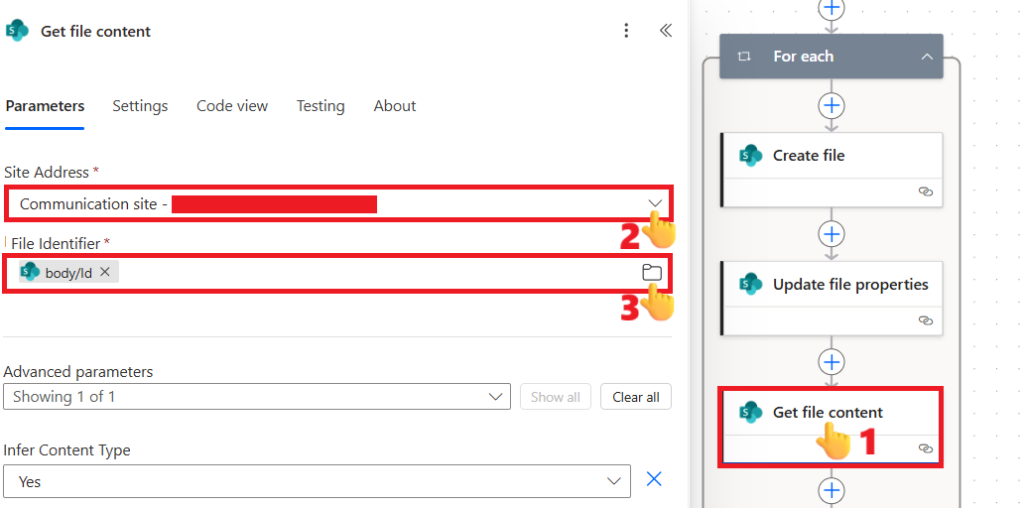
Action 5: Get file content
Use this action to retrieve the newly updated Word file. It will return the Word document with all values populated from the Excel table.
- Site Address: Select the SharePoint site where you saved the new word file
- File Identifier: From the dynamic content list, click the flash icon and select body/Id under the Create file action
Action 6: Send an email (V2)
Use this action to send an email with the newly created Word document attached. The document will include all values populated dynamically from the Excel table.
- Click the gear icon above the right side of the To field, then select Use dynamic content.
- To: Insert Employee Email from the dynamic content list by clicking the flash icon. Select Employee Email under the action List rows present in a table. If it’s not listed, type
Employee Emailin the search field to find it. - Subject: Enter a subject line for the email, for example,
"Welcome Email" - Body: Enter the email text and insert dynamic content as shown in the image below
- Attachments: Click on Advanced parameters and enable Attachments to reveal the attachments field.
Click Add new item and configure as follows:- Name – 1: Enter
Welcome-Doc-.docx. Place your cursor before.docxand insert Employee Name from the dynamic content list by clicking the flash icon. Select Employee Name under the action List rows present in a table. If it’s not listed, typeEmployee Namein the search field to find it. - Content – 1: Insert File Content from the previous action Get file content by selecting it from the dynamic content list using the flash icon.
- Name – 1: Enter

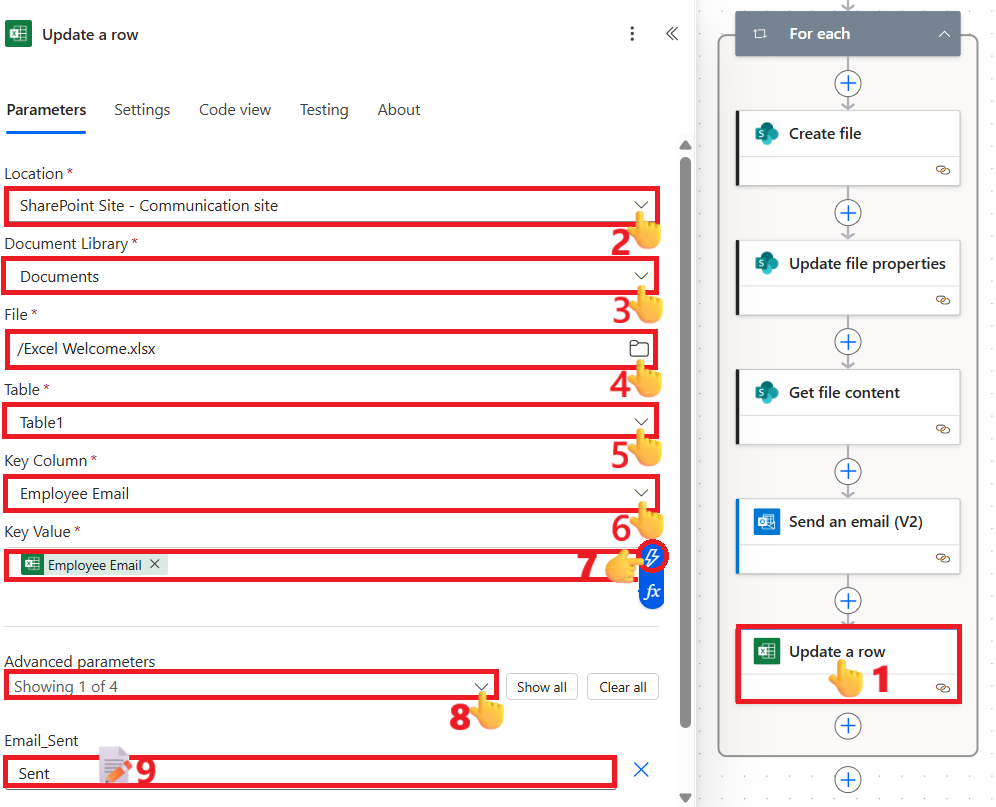
Action 7: Update a row
Use this action to update the Email_Sent column for the employee who has already received the email. This ensures the flow won’t send a duplicate email the next time it runs.
- Location: Select the SharePoint site where you’ve saved the Excel file.
- Document Library: Choose the document library where the Excel file is stored.
- File: Click the folder icon and select the Excel file.
- Table: From the dropdown, select the name of the table inside your Excel file.
- Key Column: Select “Employee Email”
- Key Value: insert Employee Name from the dynamic content list by clicking the flash icon. Select Employee Name under the action List rows present in a table. If it’s not listed, type
Employee Namein the search field to find it. - Email_Sent: Write “
Sent” there in this field
✅ Result
After running this flow, Power Automate will populate Word document without a premium license, automatically email them to each employee, and update your Excel sheet to mark the documents as ‘Sent.’
💡 Bonus Tips
- Use filters to avoid unnecessary flow runs.
- Archive old files in SharePoint to keep your flow fast.
- Test with a single row before applying to all employees to ensure your Populate Word Document setup works correctly.