
If you need a reliable way to know when important files are deleted, you’re in the right place. With Power Automate Email Alert SharePoint 4 Steps, you’ll create a flow that notifies you instantly via email whenever a document is removed from your SharePoint library.
No more guessing who deleted what – stay informed and in control.
🚀 What You’ll Achieve
By following Power Automate Email Alert SharePoint 4 Steps, you will:
- Detect deleted documents in your SharePoint library
- Instantly receive an email alert with file details
- Protect your team from unexpected data loss
- Automate manual tracking with ease
🧰 Prerequisites
- Microsoft 365 account with Power Automate access
- A SharePoint Document Library
- Permission to create and manage flows
🧱 Step-by-Step: Power Automate Email Alert SharePoint 4 Steps
🔹 Step 1: Create a New Automated Flow
- Visit make.powerautomate.com.
- Click Create > Automated Cloud Flow.
- Name your flow:
SharePoint Deletion Email Alert. - Choose the trigger: When a file is deleted (SharePoint).
- Select your SharePoint Site and Document Library.
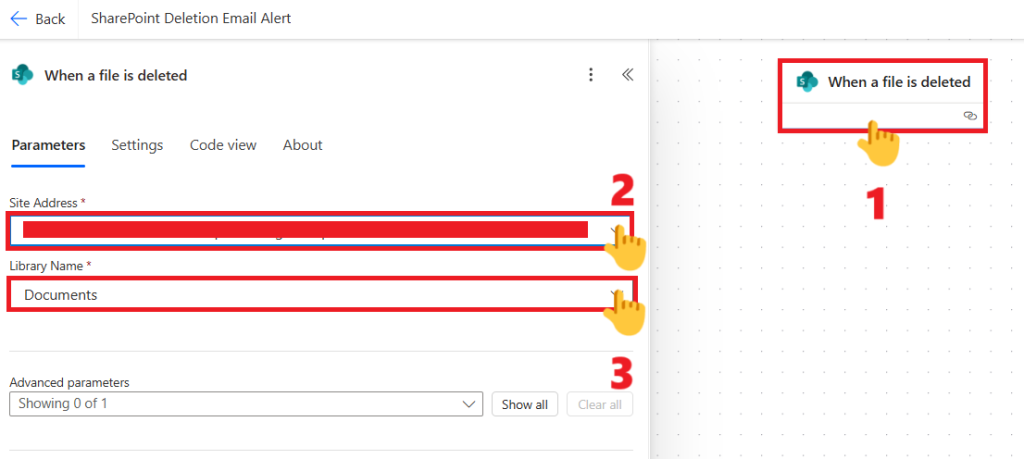
🔹 Step 2: Collect Deleted File Details
- The trigger provides metadata about the deleted file.
- Add a Compose action to extract:
- File Name
- Deleted By
- Deletion Time
- First, type the following labels in the Inputs field of the Compose action:
File Name:
Deleted By:
Deletion Time: - Then, add the corresponding SharePoint dynamic content by clicking the flash icon and selecting each field one by one from the dynamic content list.

🔹 Step 3: Configure the Email Alert
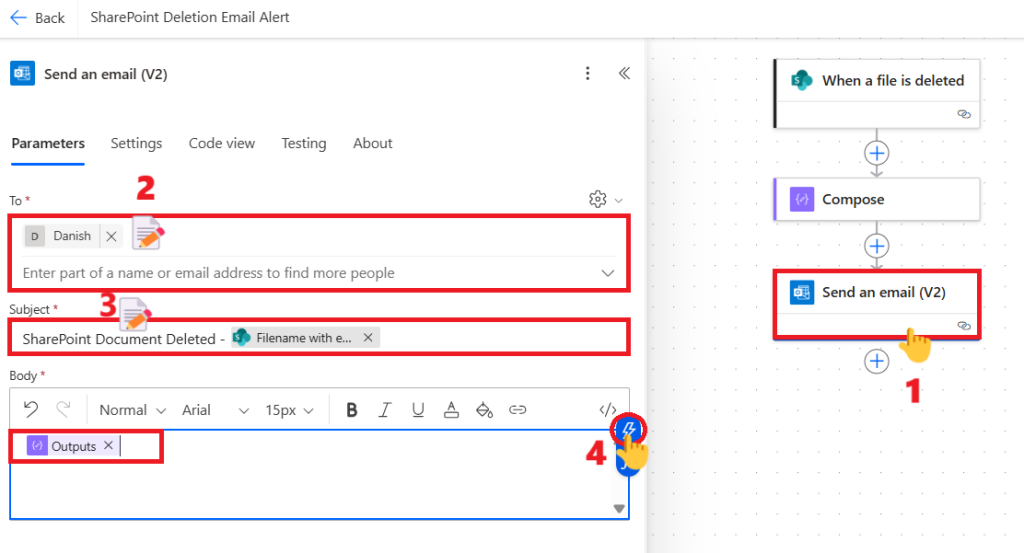
- Add action: Send an Email (V2).
- In To, enter your email address.
- In Subject:
- First, type: SharePoint Document Deleted –
- Then, click the flash icon and select the dynamic content “Filename with extension”
- In the Body field, add the output from the Compose action by clicking the flash icon and selecting it from the dynamic content list.
🔹 Step 4: Run and Test
- Delete a file from the target SharePoint library.
- Check your inbox for the Power Automate Email Alert.
- Verify that all details are accurate.
📈 Bonus Tips
- Use
convertTimeZone()in the email body to show the deletion time in your local timezone. - Share the alert with team members to improve visibility.
- Test regularly to ensure the flow runs without errors.
🏁 Wrapping Up
Your Power Automate Email Alert SharePoint 4 Steps is ready to go!
From now on, you’ll never miss a deleted document in your SharePoint library, keeping your data safe and your team in the know.