
Calendar events flow is the perfect way to kickstart your day. In just 5 minutes, you can build a flow that automatically sends your Office 365 calendar agenda to your inbox-before you even pour your coffee.
Whether you’re juggling meetings, tasks, or deadlines, this quick automation keeps your mornings organized and efficient.
📋 What You’ll Need
Before you begin, make sure you have:
- A Microsoft 365 account with Outlook access
- Access to Power Automate: https://make.powerautomate.com
- Your Outlook calendar synced with Office 365
🧭 How to Build a Calendar Events Flow in 5 Steps
🔹 Step 1 – Add the Recurrence Trigger
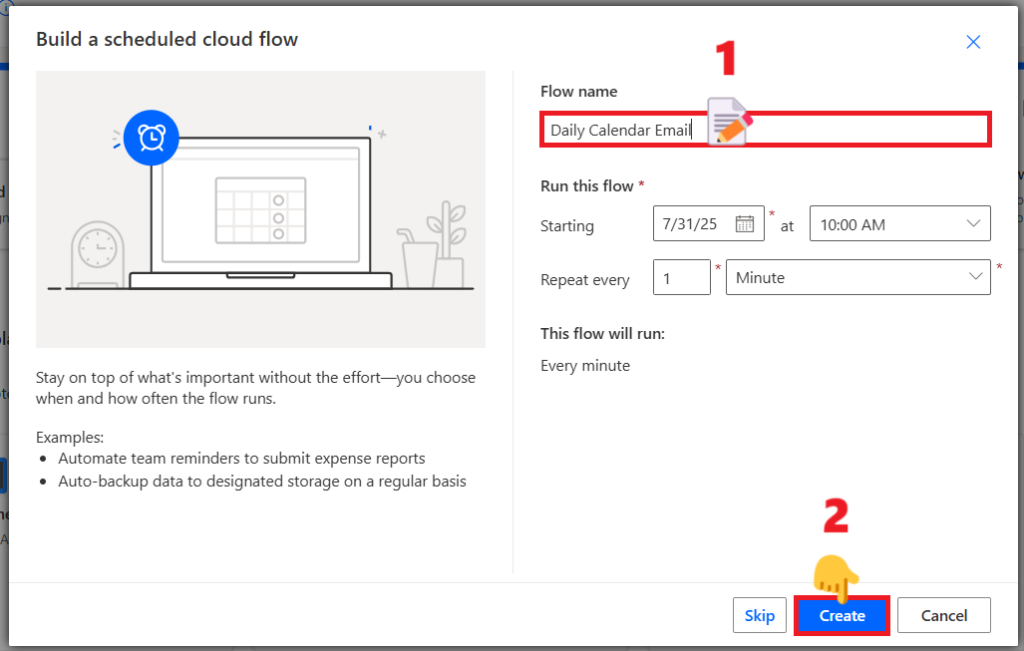
Start by creating a new Scheduled cloud flow.
- Go to Power Automate → Create → Scheduled cloud flow
- Flow name: Daily Calendar Email
- Create
- Set Recurrence to:
- Frequency: Week
- On these days: Select Monday to Friday
- At these hours: Select 7
- At these minutes: Write 15
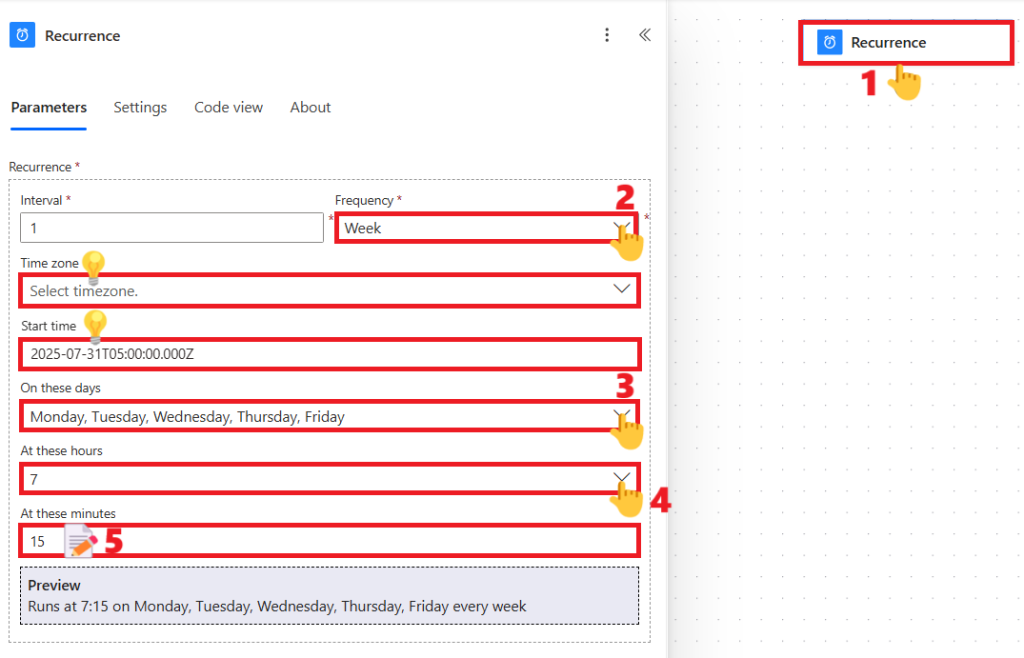
This ensures your calendar events flow runs every weekday morning.
💡The default Time zone is UTC, but you can change it as needed. For example, if you’re in the USA, you might use “(UTC-06:00) Central Time (US & Canada)” or “(UTC-05:00) Eastern Time (US & Canada)”.
💡The Start time determines when the flow begins running — you can set it to a future time if you want the flow to start later.
🔹 Step 2 – Get Today’s Calendar Events
- Add a new action: Get calendar view of events (V3)
- Parameters:
- Calendar ID: Select Calendar from the dropdown
- Start Time: Place the cursor inside the field, click the fx icon, enter
startOfDay(utcNow())in the expression popup, and then click the Add button. - End Time: Place the cursor inside the field, click the fx icon, enter
addSeconds(addDays(startOFDay(utcNow()),1),-1)in the expression popup, and then click the Add button.
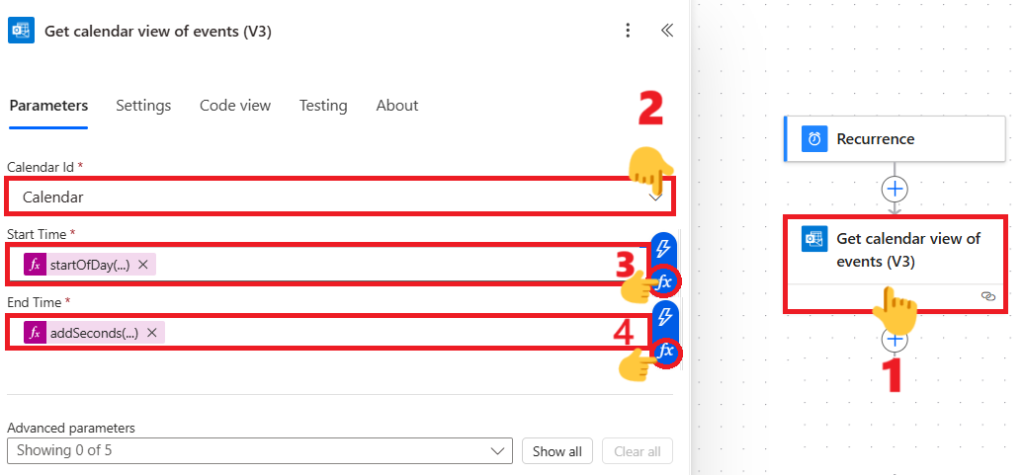
This pulls all your events for the current day.
🔹 Step 3 – Add a Condition to Check for Events
- Add a Condition control
- Use expression:
length(body('Get_calendar_view_of_events_(V3)')?['value']) is greater than 0
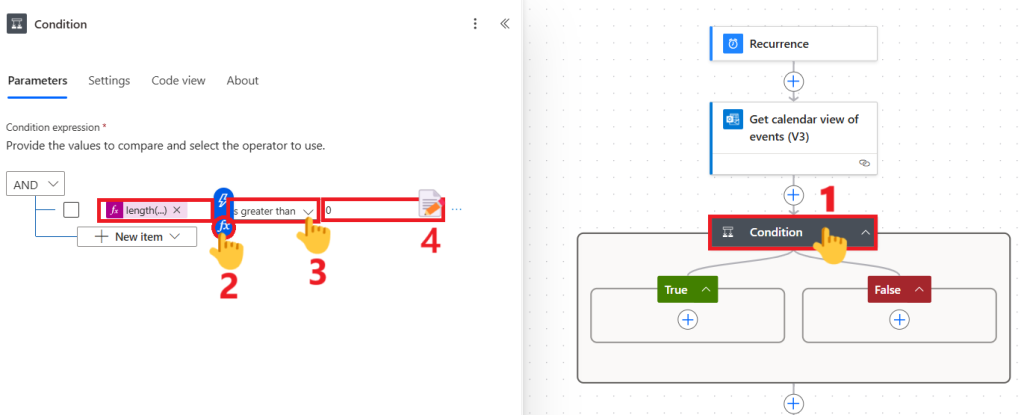
This ensures the flow continues only if you have events today.
🔹 Step 4 – Create an HTML Table from Events
Inside the “True” branch:
- Add action: Create HTML Table
- From:
value(from the Get calendar view of events (V3) action) - Click on Advanced Parameters and select “Columns”
- In Columns select Custom
- Add columns in Header and Value:
- Subject:
item()?['subject'] - Start Time:
item()?['start'] - Location:
item()?['location']
- Subject:
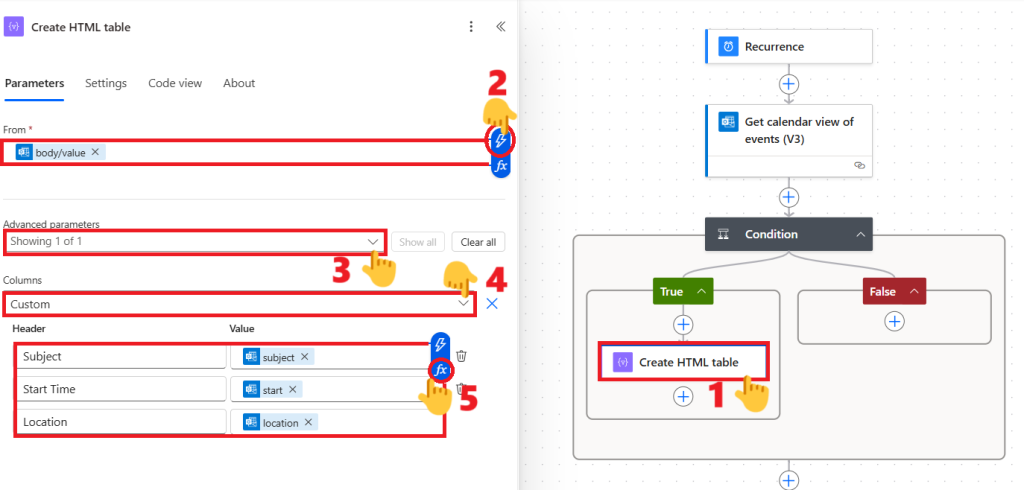
This turns your event list into a neat email-friendly table.
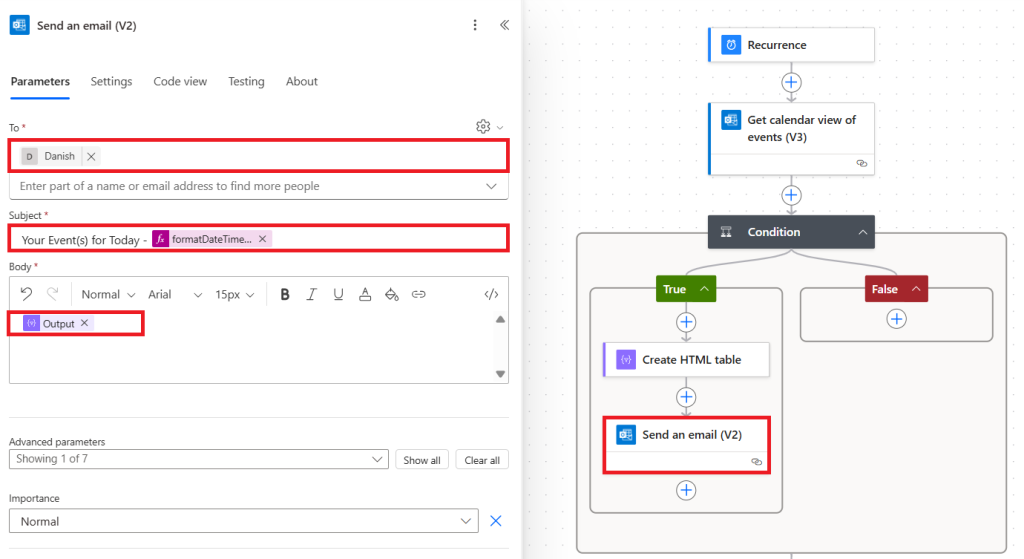
🔹 Step 5 – Email Your Daily Agenda
- Add action: Send an email (V2)
- To: your email address
- Subject: Your Agenda for Today –
formatDateTime(utcNow(),'MMMM dd') - Body: use the output from Create HTML Table
You now have a working Power Automate calendar events flow that emails your daily schedule.
💡 Bonus Tips for Your Calendar Events Flow
- ✅ Empty Calendar: In the “False” branch, you can send a polite message like “No events scheduled today.”
- 🔧 Customize Email Body: Add branding, greetings, or even a daily quote to personalize your morning digest.
- 📚 Learn More: Microsoft Learn – Outlook Connector Guide
🎯 Why You Should Use a Calendar Events Flow
Automating routine tasks can boost personal productivity by up to 40%. Your calendar is your daily blueprint-don’t let it sit buried. With just one flow, you get a daily briefing, free from distraction or delay.
Power Automate calendar events flow is not only efficient-it’s empowering.
🏁 Wrapping Up
In just five steps, you’ve built a calendar events flow that organizes your day before it begins. It’s simple, fast, and incredibly effective. Try it today and take control of your mornings-one email at a time.
💡Bonus Resources
- ✨ Unlock 3 Effortless Steps to Save Email Attachments Automatically
- ✨ Discover 3 Power Automate Triggers to Simplify Automation
- 🔄 Powerful Power Automate SharePoint Workflow 2025 for Easy Document Tracking
- 🚀 Master Automation with 6 Power Automate Date Time Actions
- 🌟 Daily Teams Quiz Bot Tutorial 2025: The Ultimate Guide to Automate Engagement