
If you’re wondering how to create your very first Power automate flow from 0, you’re in the right place. This guide is perfect for beginners who want to get started with Power Automate and create a simple automation without needing to code.
In this tutorial, you’ll learn how to build a Power automate flow from 0 that sends a thank you email notification every time you receive a new email with attachment. We’ll walk you through each step, explain key terms like triggers and actions, and help you become confident with the basics.
🧭 Step-by-Step: Create Power Automate Flow from 0
Follow the steps below to build your first Power automate flow from 0.
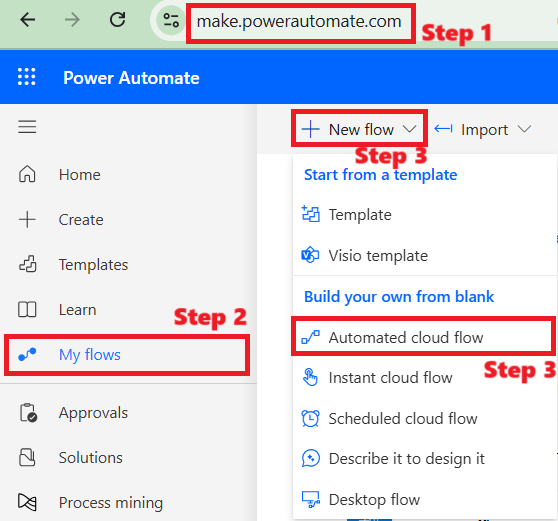
🖥️ Step 1: Open Power Automate
- Go to make.powerautomate.com
- Sign in with your Microsoft account if prompted
🧾 Step 2: Go to “My Flows”
- Click on the “My flows” tab on the left-hand menu.
- This section shows all your personal flows.
➕ Step 3: Create a New Flow
- Click on the “New flow” button at the top.
- From the dropdown, choose “Automated cloud flow”.
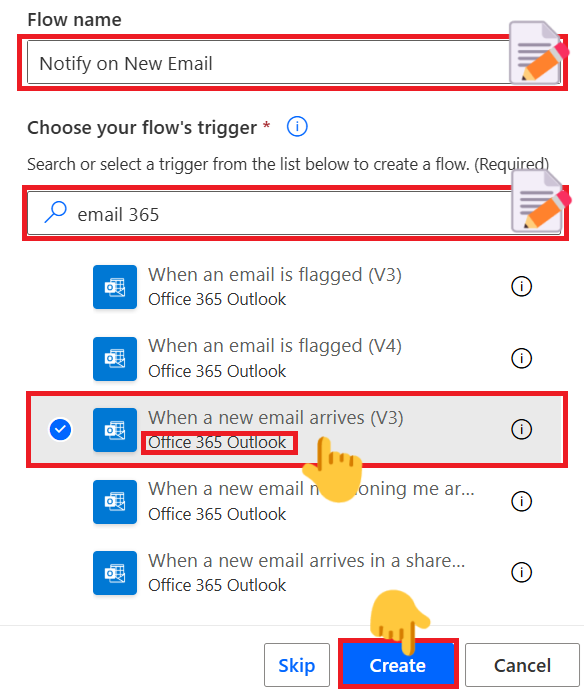
📝 Step 4: Set Flow Name and Trigger
- A pop-up will appear.
- Enter “Notify on New Email” as your flow name.
- In the search box, type “email 365”.
- Select the trigger: “When a new email arrives (V3)”.
- A trigger is an event that starts your flow. In this case, the flow begins when a new email arrives in your inbox.
- Click Create.
💡 Customize the Flow
When you click on “Create,” Power Automate will open the Flow Editor with your selected trigger already in place.
👆 Click on the trigger box to view its parameters, settings, and connection details.
Make sure your connection to Outlook is active — if there’s an error, you can easily add a new connection or fix existing issues right there in the panel.
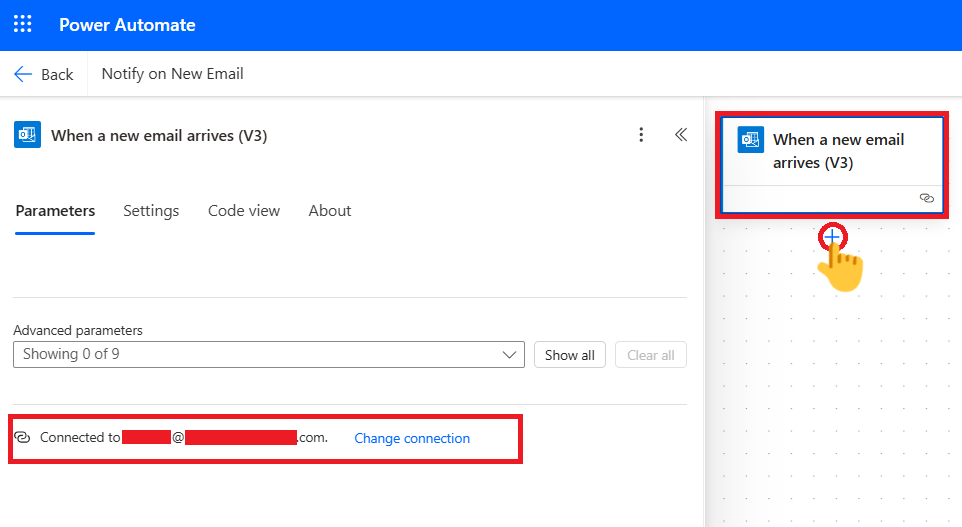
This ensures your flow runs smoothly before you move on to adding actions like email notifications or Teams messages.
⚙️ Step 5: Now It’s Time to Add Actions
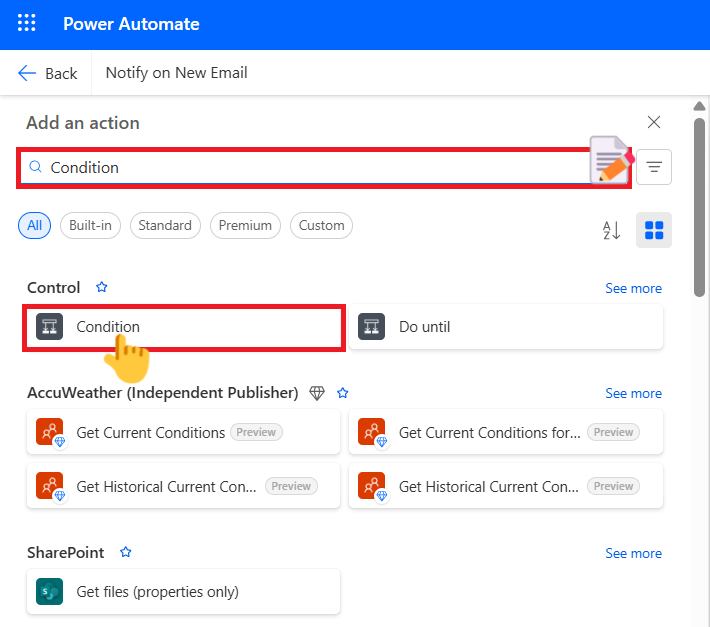
An action is what the flow does after being triggered. You can add steps like sending an email notification, saving a file, or updating a spreadsheet.
Now that your trigger is in place and your connection is working…
👆 Click on the plus (+) icon just below the trigger box in the flow editor.
This opens up more options — select “Add an action.”
🧠 In the search field, type “Condition”,
Then click on the Condition action to add it just below the trigger.
A Condition makes your flow smarter —
It allows your automation to make decisions, like:
“If the email has attachment”
or
“If the subject contains the word urgent.”
You’ll now see two input fields:
- One to define what condition to check,
- And two branches — “If yes” and “If no” — where you define what happens next.
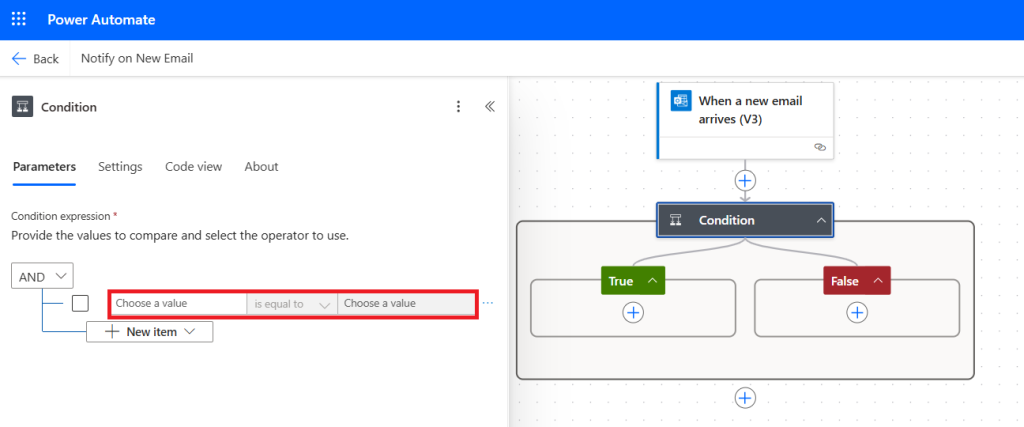
This gives your flow logic, not just action
🧪 Step 6: Add a Condition to Check for Attachments
Now let’s make the condition real —
We want to check if the incoming email has an attachment.
👆 Inside the Condition box, click on the first input field — this is where we’ll define what to evaluate.
💡 Now here’s something cool:
Click on the ⚡ flash icon next to the input field.
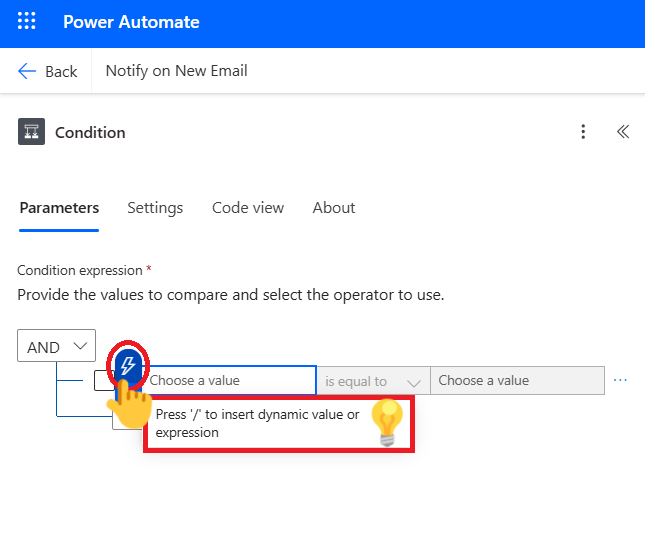
This opens up a list of dynamic content — values pulled directly from the trigger.
From this list, select:
“Has Attachments”
This input tells the flow whether or not the email includes a file.
Once selected, you’ll see it appear in the condition setup — ready for the next step.
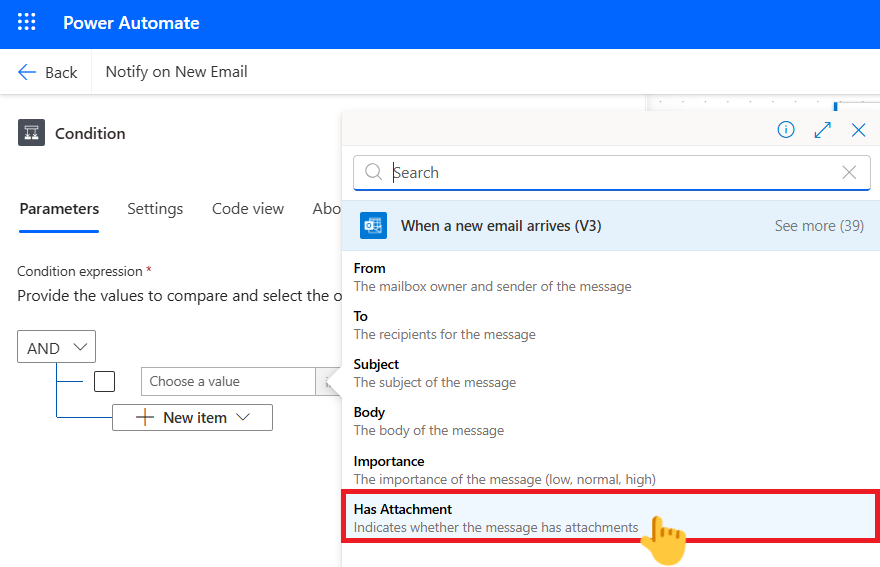
We’ll now compare this to “true” to see if the email contains any attachments.

📤 Step 7: Send an Email If an Attachment Exists
Now that we’ve set up the condition to check for attachments…
Let’s define what happens if the email does have an attachment.
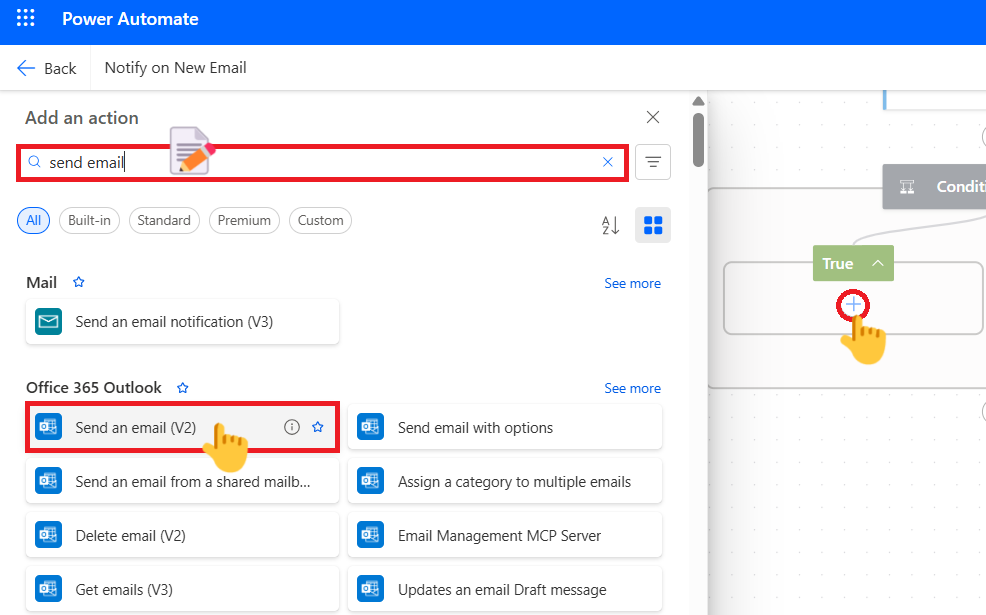
👆 Under the “True” branch of the condition, click on the plus (+) icon.
This opens the action search window.
✍️ In the search field, type:send email
From the list of actions that appear, click on:
“Send an email (V2)” — this is the Outlook action we’ll use to send a new email automatically.
Once selected, the action box will appear under the True path — ready for you to fill in the email details like To, Subject, and Body.
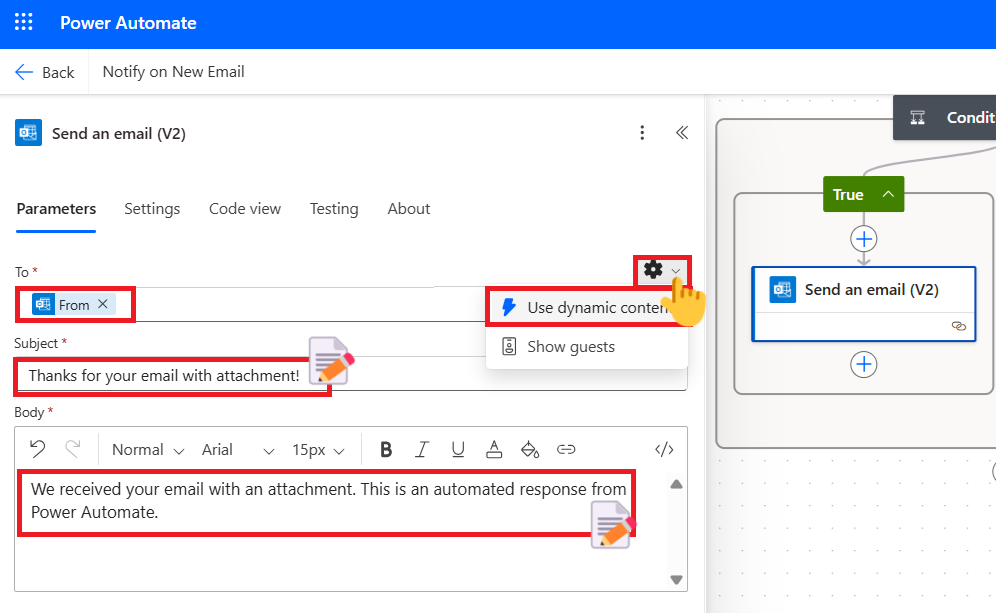
✉️ Step 8: Fill in the Email Details and Test the Flow
Now that the “Send an email (V2)” action is added, it’s time to customize it.
🖋️ Fill in the fields like this:
- To: Instead of entering your own address manually,
you can select the sender’s email address using dynamic content. 👆 Click on the ⚡ flash icon next to the “To” field. 💡- If the flash icon isn’t visible, click on the gear/settings icon in the top-right of the action box,
and then select “Use dynamic content.”
After that, the flash icon will appear. From the dynamic content list, select “From” — this represents the sender’s email from the incoming message.
- If the flash icon isn’t visible, click on the gear/settings icon in the top-right of the action box,
- Subject: For example,
"Thanks for your email with attachment!" - Body: You can write something like:
"We received your email with an attachment. This is an automated response from Power Automate."
✅ Step 9: Finalize and Save
Once your trigger and any additional actions are added:
- Click Save in the upper-right corner.
- You can now test the flow by sending an email to yourself and checking if it activates.
🔄 Summary: Build a Power Automate Flow from 0
This beginner tutorial showed you how to create a Power automate flow from 0 using the “When a new email arrives” trigger. You now understand what triggers and actions are, and how to set up a basic workflow that sends an email notification for new emails with attachment.
🧭 Where to Go Next?
If you want to level up your automation skills, check out: